Foodie Blogroll

Showing posts with label vegetable. Show all posts

Thursday, June 28, 2012

Green Mango Salad

The sun has come out and stayed with us pretty much all day yesterday...we can again enjoy the out doors without getting wet...unless we want to jump in the pool. The temperature is still in the 80's and the humidity is down. Very pleasant here in south west Florida.
After the storm I gathered some more green mangoes that fell off the tree. The Kent mango which is the kind of tree I have stays green (the skin) even when it is ripe so it looks pretty much the same you just have to touch it to see how firm it is.I received a few good ideas from my friends on what to do with green mangoes...
After collecting the firm mangoes wash them very well, they drip a sap from the stem when they are picked even when they are ripe. If you are allergic to mangoes you will be itchy from the sap if it gets on you. After doing some research I gathered some info and made the green mango salad they way I would want to eat it...not too sweet, but first I had to taste it to see how I liked it. Erica was right they taste so good with just some lime juice squeezed over the top.
This is what I came up with after looking at loads of ideas 

INGREDIENTS:
  • 1large firm green mango washed peeled and julienned
  • steamed or cooked shrimp (optional)
  • 1 carrot peeled and julienned
  • 1 small shallot sliced or diced or not you can skip it or use green onion
  • 1 teaspoon ginger fresh grated
  • 1 sprig of mint chopped
  • 1 chili chopped ( or chili flakes to taste, I used shichimi togarashi)
  • FOR THE DRESSING:
  • 2-3 tablespoons fresh squeezed lime juice
  • 1 tablespoon fish sauce
  • 1 teaspoon palm sugar or brown sugar (you can use more)
  • 1 teaspoon chili sauce or chili flakes (optional)

Mix the mango, carrots, shallots, ginger, mint and chili in a large bowl.  In a small bowl whisk together the fish sauce, lime juice, sugar and chili sauce until sugar is dissolved. Pour over the salad and toss with the shrimp or just add them on top.
Garnish with black sesame seeds, (or you could use poppy seeds) and julienned shiso leaves or chili flakes...or really anything you want!!
It was pretty easy to make and I really liked the tart taste of the green mango...who knew?! :) I think this salad would be great with jicama, it would give it another texture and slightly sweet, or you could add beans sprouts. I like the mint here instead of cilantro and I didn't go very sweet, it's just my personal preference. You can go as spicy and sweet as you like. I wonder how avocado would work with this?! Well any way you make it...it's a wonderful summer salad.

Saturday, June 16, 2012

Mexican Street Corn with Chipotle


I don't serve corn very often...I don't add it to my chili, salads, or beans. The only way I really eat corn...other than in tortillas, and corn bread is corn on the cob, and that is only when it is in season. When I ran across this "Mexican/Italian Street Corn" on Krystal's blog Recipes of a Cheapskate I just had to try it. She adapted her recipe from Cinnamon Spice and Everything Nice and made her version of Mexican street corn Italian style. Funny I am a big fan of Reeni's blog too.  I was excited to get to it, but I stuck with the Mexican Street Corn, because I had the ingredients. 
Most street corn is sold on the cob, which would be fantastic, and I have been meaning to try it for awhile now, but I like how Krystal did it off the cob. I changed it a little I didn't have fresh cilantro left so I went out in the garden and snipped some chives (I just can't grow cilantro). I used my new favorite Cotija cheese, and frozen organic corn I had just bought.

4 corn on the cob or 1 bag frozen organic corn
3 tablespoons mayo (or 1/2 cup)
juice of 1/2 lime
1 cup grated cotija cheese
2 tablespoons fresh chopped cilantro (I used chopped chives)
1 teaspoon chipotle chili powder (more or less to taste)
sea salt and fresh ground pepper

Dry roast frozen corn on cast iron griddle or skillet for about 10 - 15 minutes until it gets a nice golden color and is not wet, try not to toss it around too much to break down the corn. Remove from heat.. In a bowl mix mayo, lime juice and chipotle powder. Stir into corn, and add the cheese, mix well, salt and pepper to taste. Use the other half of lime for garnish and to squeezr on top if you like.

If using corn on the cob, you can oven roast or grill it first, then remove the corn.
Of course you can make it the original way grilling the corn on the cobs.
I loved it! So easy to make too. I will definitely be serving more corn like this. A great side to go with the Father"s Day meal you are planning!

Thursday, March 29, 2012

King Oyster Mushrooms

I just love mushrooms, and I wish I had more varieties available to me to try. Yes, I know I can order them on line...maybe some day I'll be able to do that. For now I'll just pick up some along the way that I happen to run across, and share them with you.
Like these King oyster mushrooms I found at an Asian Market down the street from my husband's jet ski shop. Where they have quite a large area for produce and fresh fish. It is so much fun going in there. They even have many already prepared foods, and smoothies and bubble tea.

Back to the King oyster mushroom, also known as king trumpet mushroom, French horn mushroom. I saw a similar abalone mushroom on My Little Space, it is an oyster mushroom variety, that tastes a little stronger...I think...so they say...I hope to try that one too.

I thought I would making it a couple different ways, oven roasted (of course) and the other is sauteed and I will post that one next.
It is a little different than the mushrooms I am used to. The cap is small and the stem is thick and the bulk of the meat, and cooks up tender. To prepare after a quick wash, remove the crusty part on the bottom...you want it nice and smooth. Slice and place on a cooking sheet sprinkle with some seasoning, garlic, olive oil and sea salt

This was another good way to use my Parmesan & garlic olive oil! Roast in a medium oven 375 degrees, for 15-20 minutes until tender. I also threw some asparagus in the oven too.

Topped with some Parmesan cheese and it makes for a nice side dish...or lunch!

It has a good texture and was very mild flavor to me. My daughter actually tried it...she said it was good, but then she didn't want any more. I was happy she even tried it. I think this will go good in most any dish. It was my lunch!


A sandwich for my husband made with roasted king oyster mushrooms, some sweet Florida onion, horseradish cheddar, cheddar cheese, arugula, radicchio with a pesto mayo to finish it off. Wonder what I'll come up with next?

Monday, March 5, 2012

Miso Asparagus

I really enjoy Jaden Hair's Steamy Kitchen blog, I first met her on twitter years ago - before anyone knew what twitter was. I was able to chat with her via twitter and have always wanted to meet her in person (she lives in the area), and she would do some interviews in restaurants and out and about would ask her twitter followers what questions we wanted her to ask, she was good at promoting twitter like that. Maybe one day I'll run into her around town.
I have been on a miso kick lately, and always like ginger so this was perfect for me to try. I have been oven roasting asparagus for awhile now and it was nice to find a different way to season it. Usually I go with herbs, parmeasan (or feta) and sliced almonds. Here is the recipe from Steamy Kitchen:

1 pound asparagus, ends trimmed
1 teaspoon cooking oil (olive, canola or vegetable)
2 teaspoons Miso & Easy (or 1 teaspoon miso paste + 1 teaspoon hot water)
1 tablespoon water
1/2 teaspoon grated fresh ginger
1 clove garlic, finely minced
1/2 teaspoon roasted sesame oil
1 teaspoon sesame seeds
Directions:
1. Preheat oven to 375F. Place asparagus on baking sheet and drizzle with cooking oil. Toss to coat. Roast asparagus for 8-10 minutes or until pierces easily with fork. Timing depends on how thick the asparagus spears are.

2. While the asparagus is roasting, prepare the ginger miso sauce. In a small bowl, whisk together the remaining ingredients until smooth.

3. Pour over asparagus and serve.


I did it a little different...I poured it over the asparagus before roasting. I used miso paste instead of the Miso & Easy product, ginger garlic paste and a little soy sauce -not too much because the miso is a little salty...oops I forgot the sesame seeds!


...but I did scoop up the sauce and added it on top. Miso adds that nice depth of flavor needed in some dishes, slightly salty, and so good in salads, pasta, potatoes, veggies and of course miso soup.
How do you use miso?


Saturday, October 22, 2011

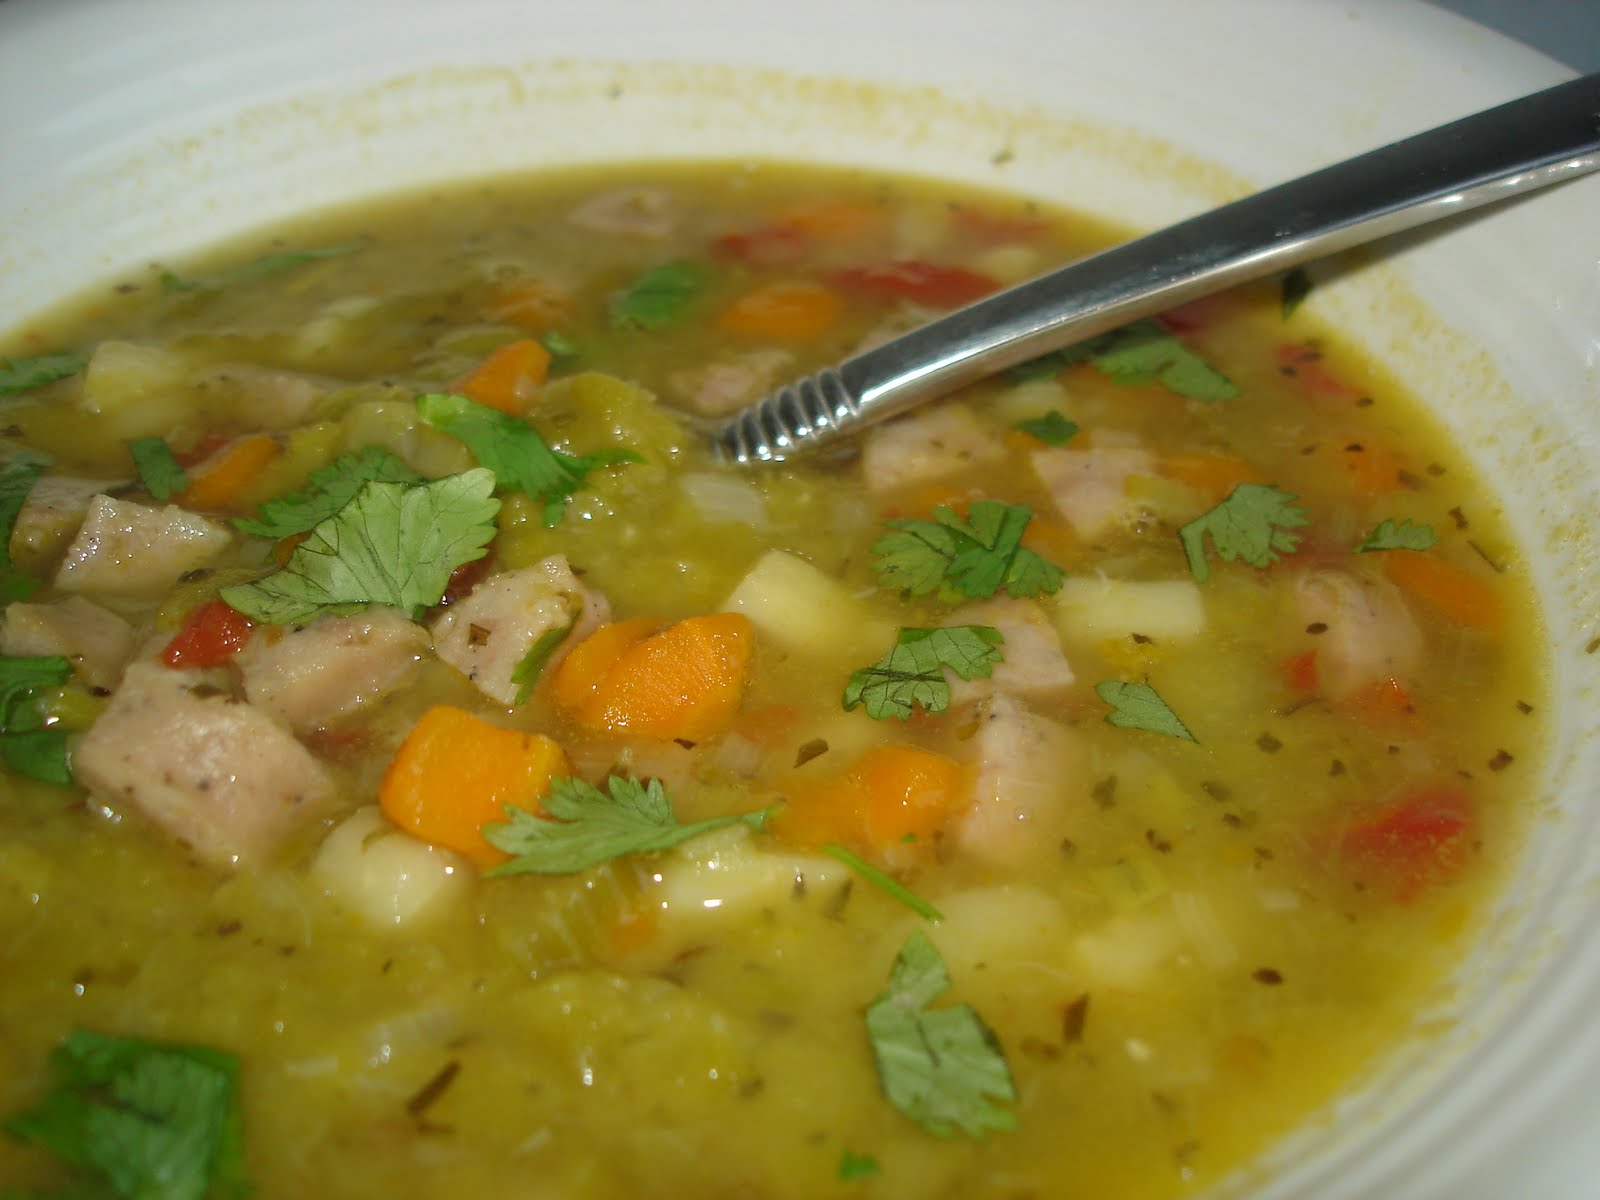
Split Pea Soup (slow cooker)

It is rather chilly for Florida this time of year. Usually our summer-like weather lasts through the end of October...I know this because you can never dress a child in a Halloween costume that is long sleeved it is just too warm still. It is nice that we can turn off the AC and open the windows, and actually sit out on the lanai without having to jump into the pool.

The temperature dropped nearly 20 degrees over night, then slowly works it way back up. We are dry and sunny so that helps. The kids at school still come in shorts and short sleeves and I knew I would have to get that box of long sleeves and sweatshirt out from the top shelf in the clinic. That where everyone comes when they need shoes for P.E. because they wore flip-flops, or a pair of shorts because theirs ripped or sweatshirt because their mom didn't check the weather forecast. :D

So Friday I had this boy come in from P.E. complaining about his legs are itchy from the cold weather, and as a matter of fact he was itchy everywhere....so I asked how I could help him...he just wanted some calamine lotion (it's magic you know). The funny part is he asked me if he could get frost bite...I told him not in 70 degree weather so he was pretty safe! :) Ha! Florida kids!


To take the chill off from you... soup is a good start! This is one of my favorite split pea soups, I've made it many times. I found the recipe in Parade magazine years ago, it is for a crock pot or slow cooker. I have made it stove top too, both ways are good, you just have to make it the way that works best for you!


Ingredients:
2 carrots
2 ribs of celery
1 parsnip (I used 2)
1 onion (I used shallots)
1 leek (3 inches of green left on) I think I used 2
1 ripe tomato
1 ham hock (Optional - I never use this I just dice up some smoked sausage or leave it out if you want it vegetarian)
1 3/4 cups dried split peas
2 tablespoon olive oil
1 bay leaf
1 teaspoon dried thyme
1 teaspoon dried tarragon
4 cups defatted chicken broth (or vegetable broth for vegetarian)
4 cups water
salt and pepper
chopped fresh parsley or cilantro

Method:
Cut all of the vegetables into 1/4 inch dice and place them in a crock pot. Add all of the remaining ingredients except salt, pepper and parsley. Cover and cook high for 7 hours. Remove the ham hock and let cool slightly so you can shred any meat from the bone and return the meat to the pot. Season with salt and pepper then stir in the chopped parsley. Make sure you remember to remove the bay leaf before serving.


This time I made it in my dutch oven and with a little oil in the pot I sauteed the onion, celery, carrots, parsnips and leeks for about 5-10 minutes. I like to then add the seasoning, I was a little generous with the measuring and I might of added some marjoram and garlic too. Next add the diced sausage then the tomato. I added 4 cups of broth and 2 cups of water, and cooked it for about 1 hour to 1 1/2 hours. Then add the salt and pepper and add more water when necessary...make it as soupy as you like it or as thick. Stir in the parsley right before serving.


I just sprinkled the cilantro on top, and I am sure my daughter had sour cream on top of hers...


I like soups with a small dice, the peas are well incorporated into the soup so the veggies stand out. Yum, it just seems to warm you up nicely!

Sunday, October 16, 2011

Spinach Artichoke Spread

If you have a jar of artichoke hearts sitting in your cupboard....you know the one that you meant to use but never got a round to it. This is a nice way to use it. It's a spread that I serve cold and is great on those little garlic toasts that you can make or pick up at the deli section of your grocer.

Ingredients:
1 jar (or can) artichoke hearts, rinsed, drained and chopped
1 package frozen chopped spinach, thawed and liquid squeezed out
4-6 oz cream cheese softened at room temperature
1/2 cup sour cream
1/2 cup mayonnaise
1/2 cup grated Romano or Parmesan cheese
1-2 teaspoons roasted garlic or 1 - cloves chopped
1/2 tarragon

Make sure you rinse the artichoke heart when you are draining them, try to use the ones that are packed in water. If not just rinse well and drain.
If you want to use roasted garlic...peel away the outer layer of skin and slice off the top of a head of garlic so you can see some of the cloves, and drizzle with olive oil. Wrap in foil or place in a clay garlic roaster or baking pan or muffin tins. Bake at 400°F for 30-35 minutes, or until the cloves feel soft when squeezed. Roasted garlic can be added to so many dishes and gives it a wonderful mild not so sharp garlic flavor.

In a bowl (of course) stir the soft cream cheese until smooth and add the sour cream and mayo. Then add the remaining ingredients and blend together. You can adjust the amounts until it is the right consistence for a spread. You might want to less mayo or more cream cheese if you like a spread rather than a dip.

You can always add mozzarella or Monterey Jack cheese, some hot sauce, more garlic and bake it in the oven to have a hot spinach artichoke dish. Or maybe I'll just post that one latter for the holidays! Enjoy!

Saturday, July 23, 2011

Soba Noodles with Garlic Chives

I change my blog address to a dot com, so I hope this doesn't mess you up in google reader or however else you might follow my blog! Thanks for sticking with me on this.
I found some of these flowering chives at the Vietnamese store near my husbands work. I like to get the different vegetables that I see there and don't see in the supermarket, and then try them out in a dish. Lately I have seen flowering chives, also called garlic chives on a few different blogs, so I got some ideas and was all set to go. Of course I usually would just end up using most of the with noodles or a stir fry.

From this store they came in a good size bunch, but it does seem to hold up well in the fridge. I like the mild garlic flavor and have been adding them to scrambled eggs, potatoes, and chicken salad so far...
...for this dish I used some cooked chicken and a few other veggies that I had little bits left in the fridge.

Ingredients:
8 oz cooked chicken
a small bunch of garlic chives
2 packets soba noodles cooked
4 oz snow peas
4 oz bok choy or carrots, or whatever other vegetables you might have
1-2 cloves garlic chopped
2 tablespoon oyster sauce
2 tablespoons light soy sauce
1 teaspoon garlic-chili sauce
1-2 teaspoons sesame oil

Prepare the vegetables, by washing and chopping into uniform sizes..cut the chives in about 2"-3" size pieces...use the buds, but get rid of the tough ends. Remove the strings in the snow peas, you can cut them or leave them whole. If using carrots julienne cut them about the size of the chives.

In a heated wok or skillet add a little oil then toss in the veggies that take the longest to cook first, add a little water if needed to help steam them...add the garlic and chives, then the rest of the seasoning. You could add the garlic first in the heated oil for about 30 seconds, but I'm always afraid it's going to burn...and you know how bad burnt garlic tastes. Since the meat I was using was already cooked you are just...


...heating it through. If you are using greens that are bitter add a splash of Chinese black vinegar or Chinese cooking wine.


Place a serving of the noodles in a bowl (I like to add a little toasted sesame oil to the noodles)...then the chicken veggies on top. You could toss it all together in the pan first if it works better for you.


As with many of the dishes that I make they are so versatile and you can adjust the seasoning and additions to suit your family. I just want you to get out there and try some new-to-you ingredients and have some fun in the kitchen! Then of course those of you who use these all the time can give me some more tips and ideas!!

Friday, May 27, 2011

French Chicken and Root Vegetables


Whew!! I am finally able to put up a new post. Blogger has been blocking me out for days now...I couldn't get to my own blogs or comment on my friend's blogs from my home computer. It is very frustrating. I don't know if they got it all fixed now...but I think I am still having trouble commenting on some blogs. I could do this from some other computers, so I don't know what's going on. But here I am now!

This post was long overdue and to Bo I do apologize for the delay. I was absolutely thrilled when Bo from Bo's Bowl notified my that I was the winner of a 3 1/2 qt. Le Creuset Fennel Wide Oval French Oven on his blog giveaway!!


I love it! I have always wanted one, but haven't been able to get it just yet! Did I tell you I was so happy?!!


I can't believe how lucky I have been...just look how pretty it is. I know this will get a lot of use, and look pretty doing it's job in the kitchen. Did I tell you how excited I was to win this?!!


I have used this several times already, but for the first meal I did make a French style chicken and root vegetables to break it in properly. It is so nice you can brown the meat in this pan and finish it in the oven, or as I did, finish it stove top.
I used chicken thighs and I had a couple of boneless chicken breasts so I threw them in there too.

2 tablespoons oil for browning
1 large shallot chopped
salt and pepper
2 teaspoons Herbes de Provence (I used Penzey's)
2 cloves garlic
1 tablespoon lemon juice
1/2 cup broth
handful of fresh shiitake mushrooms
1 tablespoon dijon mustard
2 tablespoons white wine (optional)
3 tablespoons cream or half and half


Wash and pat dry chicken on med-high heat pan with a little oil, season chicken with salt, pepper, and herbes de Provence and brown chicken on each side. I added the thighs first because they were bone in and would cook a little longer than the boneless breasts.


Turn down to med heat and add the shallots and cook for a few minutes, squeeze the lemon juice over it then add garlic, mushrooms and broth, cover and simmer for 40 - 45 minutes until done. You could finish in the oven if you prefer. You can add the root vegetables and cook them with the chicken, but I didn't want to crowd my new pan just yet I had to get the feel for it.


Remove chicken from the pan and skim the chicken fat off. On low heat add wine
and cook until the alcohol cooks off (or skip it) add dijon and cream stirring until well blended, cook until heated through. Serve over chicken.


Yum! This was so good with the root vegetables and veggie noodles. So simple yet so good! I was going to post the veggies here too, but it has taken me forever!!! So next post you'll see how easy it is to do the veggies.


Did I tell you how much I love this Le Creuset French oven?!! Thanks Bo!

Thursday, February 3, 2011

Another way to use Chickpea flour ~ Cabbage Fritters


I think Indian households aren't the only ones that should have chickpea flour as a regular staple in their pantry. I have really enjoyed using it. Also known as gram (besan) found in Indian markets, or garbanzo bean flour that can be found in your health or natural food markets and even in some supermarkets. Many use it in gluten - free diets. I am keeping it on hand in my pantry from now on!
I have been using Bob's Red Mill brand and have found it in many stores near me. I think Walmart carries one that is garbanzo bean and fava bean blend. I haven't tried that one yet.
I found another recipe from Jay's blog Tasty Appetite this time she uses shredded cabbage. I happened to have a cabbage on hand and tried it right away. Cabbage Fritters are easy to make and oh-so-tasty!
I had some savoy cabbage so I sliced it thin, then cut it crosswise, in a nice loose chop. I made just a little adjustments to the original recipe. In a bowl I mixed:


1/2 cup chickpea flour
2 Tbsp rice flour
1 tsp green chili powder (New Mexico green Chile)
1/4 teaspoon turmeric powder
1 tsp cumin
1/2 tsp celery seed (more or less)
a pinch of asafetida
salt and pepper to taste
oil to fry

To that add some water to make a thick batter. Then ...


...add the shredded cabbage about 2 cups, and mix well...


Heat oil in a skillet or frying pan. I made them into little patties and dropped them in the hot oil, I like to pan-fry rather than deep-fry, that is just my preference. Fry the fritters until they turn golden brown.
Drain the excess oil by placing the fritters on paper towels. Sprinkle a little sea salt over them while they are hot if desired.


Here is another yummy snack or side that you don't feel so guilty eating. It's a great way to get your kids to eat their cabbage or any veggie, my daughter liked them. So quick and easy and tasty. They went almost as fast as I made them.


We ate them just as they were like this, but I'm sure you could find many thing to dip them in.


I wanted to see how they would be it I just dropped then into the oil and fried them like this.


It was good that way too, but I think I prefer the first way in the little fritter patties.


Of course doesn't frying make everything taste good? This is a double goody with the benefits of garbanzo bean flour and cabbage so I think it balances out don't you?

My sister and niece are flying in to night for a week long visit. My parents rent a place out on the key for a month, so they stay with them. I know it only takes 4 minute to drive there from my house. They are right there at the beach. It will be nice for them to get out of the snow for awhile. I hope the weather keeps up like it has been for them, it's been in the 70s F. It's nice having family around.