Foodie Blogroll

Showing posts with label vegetarian. Show all posts

Friday, June 20, 2014

Tomato and Cheddar Grits

We do enjoy grits at our house. It's kind of like a blank canvas that you can add so many things to What ever you like, or have on hand. So as always here is just one version that I made and enjoyed, then you can make it the way you like it.

Tomato and Cheddar Grits

  •  1 1/4 cup grits
  •  2 cups water
  • 2 cups milk
  • 1 cup marinara sauce
  • 2 tablespoons butter
  • 1 teaspoon garlic bread seasoning
  • 2 teaspoons worcestershire sauce
  • dashes of your favorite hot sauce (I used Peri Peri hot sauce)
  • 1 cup cheddar cheese


Heat up the water, milk and butter to a simmer, add the marinara sauce, worcestershire sauce and seasoning. Slowly add the grits while you are stirring so you won't get any lumps. Continue to cook on a low heat until it thickens. I like mine a little thinner, but if you like thick grits you can use 1 cup grits to 3 cups liquid (water/milk).

When it thickens add the cheese until it  melts and salt and pepper to taste. Serve warm, I garnished with some asiago shavings. Remember to rinse off the spoon before it dries and gums on the spoon!


This was very good with a fried egg. It reminded me of the Rum Tums we always eat at Christmas time. When you refrigerate the leftovers it become quite thick, I just fry it up in a pan, if you like it like polenta, you need to make it with less milk, and have a thicker grits to begin with. Then cut it in squares and fry it up. Yum!

Thursday, July 12, 2012

Eggplant Roll Ups

I had an eggplant that I had to use up. My husband loves eggplant, but not my daughter so much, so it is hard to use it unless I make something just for him. So that is what I did...since my daughter had a friend over to watch The Bachelorette, when I fix dinner for them, I made stuffed poblano peppers for them, because my husband doesn't like peppers...so I guess it was a win win, but a little busy for me.
For the eggplant I hand sliced it so the slices could of been a little more even...should of got my slicer out of the drawer, but you know how it goes, it was just week a night dinner. You can grill them or use a grill pan, but I placed them on a stoneware sheet and oven roasted until soft.
 Ingredients:
  • 2 medium eggplant sliced thin about 1/4 inch (brushed w/oil, salt and baked until soft)
  • 8 oz spinach I use chopped frozen in a bag
  • 1 small onion or shallot chopped
  • 4 oz mushrooms sliced or chopped
  • 3 oz cream cheese
  • 2 cloves garlic chopped
  • 1/2 cup Parmesan cheese
  • 2 tablespoons pine nuts toasted (optional)
  • 1 teaspoon Penzey's Mural of Flavor (or Italian seasoning)
  • 1 squeeze lemon juice
  • 1 pinch of nutmeg
  • a few fresh basil leaves
  •  salt and pepper to taste
  • tomato sauce as needed (I use a prepared marinara sauce) 
In a skillet saute the onion, garlic, and mushrooms for about 3-5 minutes until the onions are soft, and mushrooms are cooked. Add the spinach and cook some of the moisture out, squeeze the lemon juice over the spinach, add the nutmeg, seasoning and cream cheese, cook until the cheese is melted and stir to blend. Finally add in the Parmesan and pine nuts (I like to toast the pine nuts first) salt and pepper to taste, mix well.

Place a basil leaf and a spoonful of the filling mixture at one end of the eggplant slice, roll up and secure with a toothpick if needed. Place the roll seam side down in a baking dish with some sauce on the bottom. Sprinkle a little cheese over the top.
Bake at 375 degrees for 20 - 25 minutes until the cheese melts and it's bubbly.

Thursday, March 29, 2012

Sauteed King Oyster Mushrooms


I enjoyed playing around with this giant mushroom, I can't wait to find more and see what else I can discover. I was reading how Juliana dealt with this mushroom in a saute on her Simple Recipes blog. I was inspired by her and Kristy and added my own twist on the final product...
As promised here is the sauteed king oyster mushrooms, or stir fry however you want to call it.

This time I am seeing what can be done with the texture. Although it isn't the exact same mushroom as Kristy used on My Little Space I wanted to try shredding it like she did so that's what I did instead of slicing the mushroom, you don't use a knife...just my hands to tear it apart.

Does it look like chicken? These are such lovely mushrooms.


including a Florida sweet onion ...not the whole thing, I use just a quarter of it. I love it when these are in season. They are not too strong at all, and they caramelize nicely.

with the green beans that were already in the fridge, just sliced them up, along with some flowering chives...
...and I am also going to try the culantro in this dish.


Ingredients:
2 - 3 King oyster mushroom
1 cup green beans sliced
1 shallot or small sweet onion chopped
3 cloves garlic crushed and chopped or garlic paste or garlic ginger paste
1 handful flowering chives sliced
2 - 3 culantro leaves chopped or 1/3 bunch fresh cilantro
1 tablespoon butter
½ tablespoon soy sauce
Sea salt and pepper to taste

Directions:In heated pan add the butter and saute the onions and garlic for 1 -2 minutes, add the beans and cook until tender. Stir in the mushrooms, chives, soy sauce, culantro, sea salt and pepper. Let them cook over high heat for a couple of minutes or until mushrooms become soft / tender. If using cilantro add it toward the end. (If you like it spicy you can add red pepper flakes or chilies.)

I used mushroom soy sauce and it did turn out a little dark if you wanted to look like chicken...but it was really good. I really liked this dish, I will definitely make sure this to a regular around here. So satisfying you don't miss even the meat.

Monday, November 28, 2011

French Toast -with Chickpea Flour - no eggs

I didn't have a chance to post my breakfast post this weekend...a little busy...(I'll get into that later) I made this Saturday immediately after I saw it on Yummy Tummy So excited that I had most of the ingredients already so I was good to go! She is like me ...not liking sweets for breakfast... I used what I had on hand and this, like most of the recipes I make is so versatile to make it the way you like it.

Ingredients:

4 slices of bread
2 tablespoons oil (for the pan, actually butter would be good here)
1 cup chickpea flour (gram flour)
1 teaspoon turmeric
1/2 tsp chili powder (make it as spicy as you like...or not)
1/2 tsp garam masala
1 tablespoon fresh snipped chives
1 shallot chopped
1 teaspoon honey
2 tablespoons chopped cilantro
1/2 teaspoon salt
water


In a shallow bowl mix the chickpea flour and dry spices...


add the remaining ingredients and slowly add some water and stir it all up until it makes a thin batter.


dip a slice of bread ...just like you would if making French toast...


flip it to coat both sides...

I had the batter too thick at first...it was okay, but I liked it better when I added more water to thin batter.


Heat a griddle with a little oil(oil with butter will work)...I just picked this cast iron griddle at Macy's on Black Friday! My Christmas gift to myself...or I should say to my family, because we all can use it for pancakes, tortillas, burgers, grilled sandwiches...well just about anything! So this is my first try out with my new pan!!!


Toast them like you would making French toast, then flip to the other side.. I added butter on the second batch I made, since that is what I like about making French toast...cooking it in butter.


I thought it was a little bitter so I added a touch of honey...maybe it could use a little lemon or lime juice...or yogurt?


It was a very satisfying breakfast, and my daughter even liked it. She is so good about trying new things!

A little finishing salt on top...I forgot to add salt into the first ones. Mmm, so good and so hearty! I'm sure you can find many other things to add to this savory, egg-less French toast! So I learned a few things along the way, and it was easy to try out a few different things. What you you add?

Friday, October 28, 2011

Breakfast Egg and Toast Cups

If you know me you know that I like to get more savory breakfast ideas. The weekends are when I spend a little more time making breakfast, rather than the whole grain toast with almond butter and ginger jam! The typical breakfast on the run out the door! So here is another one that I happened to catch on Jaden's Steamy Kitchen ...bacon, egg, and toast cups she used muffin tins to make hers. I thought I would change it up a little...(ha! what did you expect?)

I used individual cups for these, I have several different size ramekins, so I used one that would hold the goodies... I didn't have a crowd to feed so I just made three of them.

First cut a out a circle in the slice of bread, use a cookie cutter, tuna can or anything round that would work here. You were supposed to flatten it out slightly, I didn't, but it still worked fine.


Directions:
Preheat oven to 375 degrees F.
Lightly butter 6 standard-sized muffin cups or the individual cups that you plan to use.


Cut each round, then press into each muffin cup, the halves will overlap slightly, but in these ramekins they didn't so I just added some more bread.


Make use of extra bread to patch any gaps, press into place.


Brush the tops of the bread in each muffin cup with melted butter.


Lay in some spinach and sprinkle with some shredded cheese. I used some organic chopped frozen spinach that I always have on hand, you don't have to thaw it first. If you are frying up some bacon and you have the pan out already go ahead and toss some fresh spinach and saute, or chopped tomatoes, even onions if you like then add them to the bottom here.


Crack one egg into each cup and season with salt, pepper and a little herb blend, then bake until the egg whites are just set, about 20 to 25 minutes.


I made one with the egg whole...


...and another with the egg mixed up a little and a dash of cream added.


...sprinkle some grated cheese and fresh chives, and serve while still warm...


..or run a knife around cups to loosen and serve immediately.


So easy and a perfect way to make breakfast a little special!

Saturday, October 22, 2011

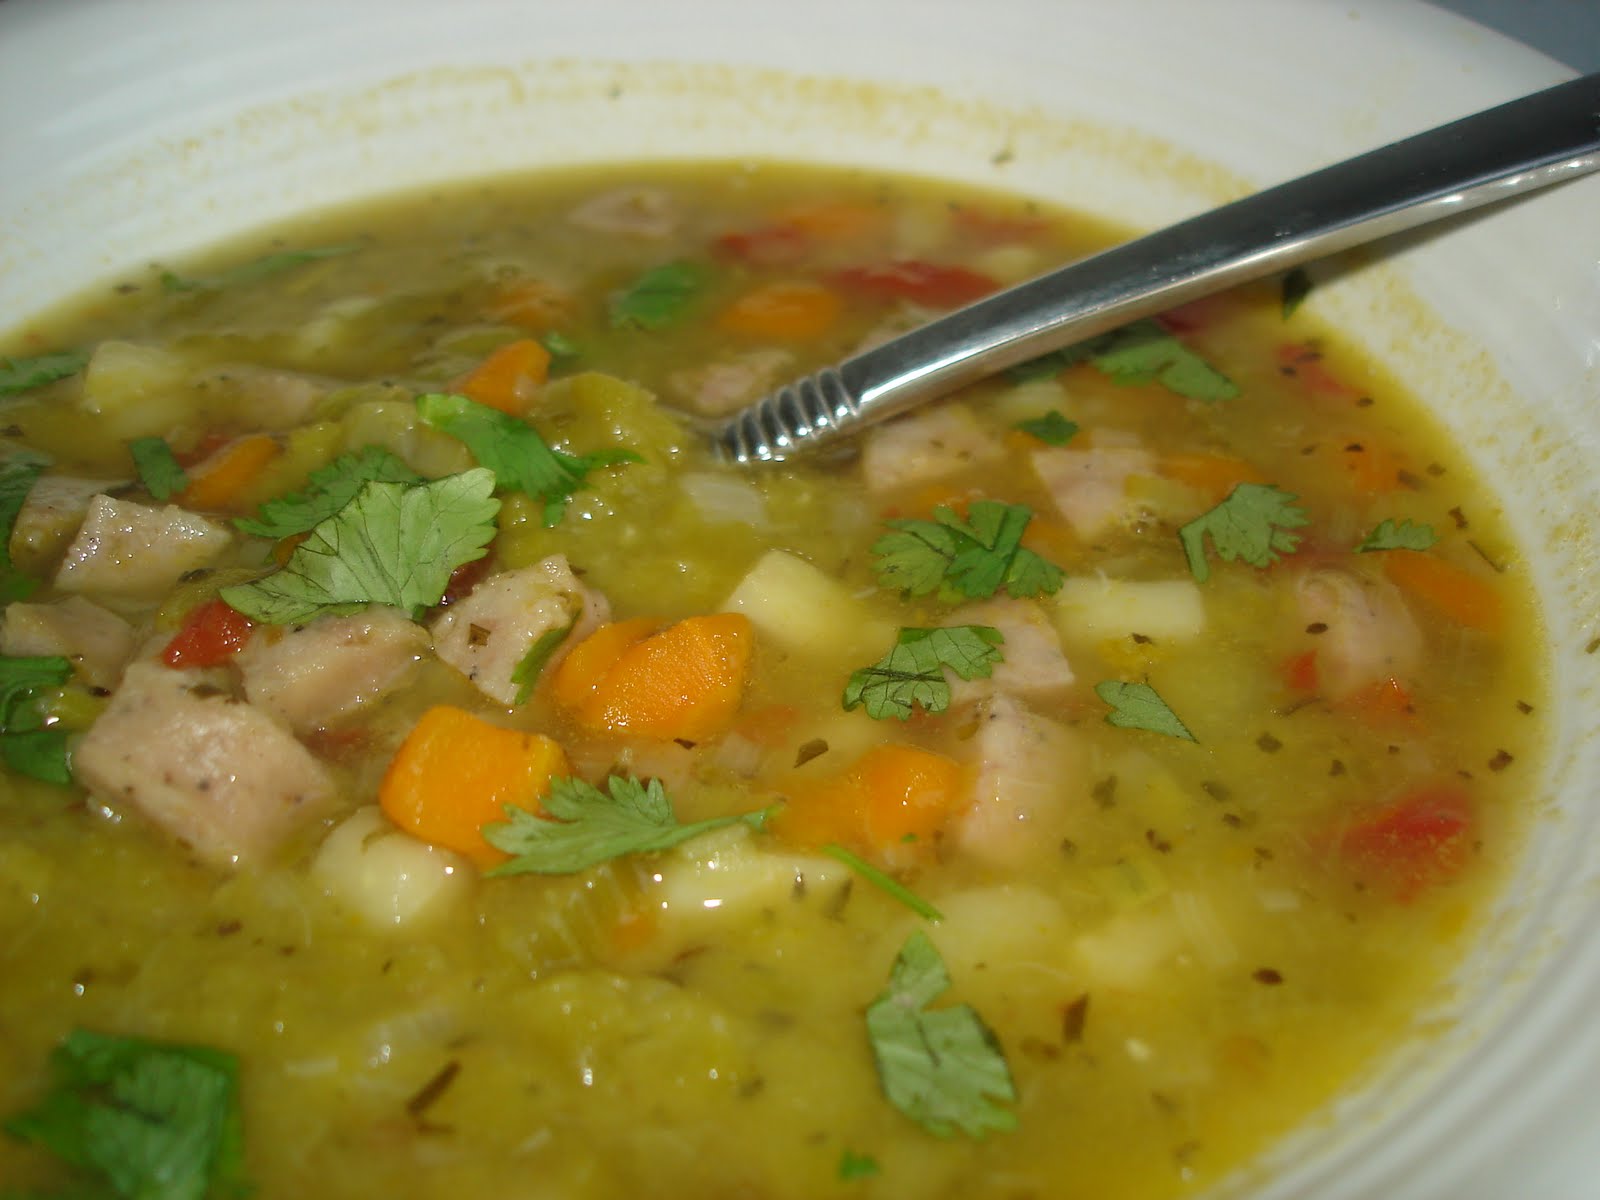
Split Pea Soup (slow cooker)

It is rather chilly for Florida this time of year. Usually our summer-like weather lasts through the end of October...I know this because you can never dress a child in a Halloween costume that is long sleeved it is just too warm still. It is nice that we can turn off the AC and open the windows, and actually sit out on the lanai without having to jump into the pool.

The temperature dropped nearly 20 degrees over night, then slowly works it way back up. We are dry and sunny so that helps. The kids at school still come in shorts and short sleeves and I knew I would have to get that box of long sleeves and sweatshirt out from the top shelf in the clinic. That where everyone comes when they need shoes for P.E. because they wore flip-flops, or a pair of shorts because theirs ripped or sweatshirt because their mom didn't check the weather forecast. :D

So Friday I had this boy come in from P.E. complaining about his legs are itchy from the cold weather, and as a matter of fact he was itchy everywhere....so I asked how I could help him...he just wanted some calamine lotion (it's magic you know). The funny part is he asked me if he could get frost bite...I told him not in 70 degree weather so he was pretty safe! :) Ha! Florida kids!


To take the chill off from you... soup is a good start! This is one of my favorite split pea soups, I've made it many times. I found the recipe in Parade magazine years ago, it is for a crock pot or slow cooker. I have made it stove top too, both ways are good, you just have to make it the way that works best for you!


Ingredients:
2 carrots
2 ribs of celery
1 parsnip (I used 2)
1 onion (I used shallots)
1 leek (3 inches of green left on) I think I used 2
1 ripe tomato
1 ham hock (Optional - I never use this I just dice up some smoked sausage or leave it out if you want it vegetarian)
1 3/4 cups dried split peas
2 tablespoon olive oil
1 bay leaf
1 teaspoon dried thyme
1 teaspoon dried tarragon
4 cups defatted chicken broth (or vegetable broth for vegetarian)
4 cups water
salt and pepper
chopped fresh parsley or cilantro

Method:
Cut all of the vegetables into 1/4 inch dice and place them in a crock pot. Add all of the remaining ingredients except salt, pepper and parsley. Cover and cook high for 7 hours. Remove the ham hock and let cool slightly so you can shred any meat from the bone and return the meat to the pot. Season with salt and pepper then stir in the chopped parsley. Make sure you remember to remove the bay leaf before serving.


This time I made it in my dutch oven and with a little oil in the pot I sauteed the onion, celery, carrots, parsnips and leeks for about 5-10 minutes. I like to then add the seasoning, I was a little generous with the measuring and I might of added some marjoram and garlic too. Next add the diced sausage then the tomato. I added 4 cups of broth and 2 cups of water, and cooked it for about 1 hour to 1 1/2 hours. Then add the salt and pepper and add more water when necessary...make it as soupy as you like it or as thick. Stir in the parsley right before serving.


I just sprinkled the cilantro on top, and I am sure my daughter had sour cream on top of hers...


I like soups with a small dice, the peas are well incorporated into the soup so the veggies stand out. Yum, it just seems to warm you up nicely!

Sunday, October 16, 2011

Spinach Artichoke Spread

If you have a jar of artichoke hearts sitting in your cupboard....you know the one that you meant to use but never got a round to it. This is a nice way to use it. It's a spread that I serve cold and is great on those little garlic toasts that you can make or pick up at the deli section of your grocer.

Ingredients:
1 jar (or can) artichoke hearts, rinsed, drained and chopped
1 package frozen chopped spinach, thawed and liquid squeezed out
4-6 oz cream cheese softened at room temperature
1/2 cup sour cream
1/2 cup mayonnaise
1/2 cup grated Romano or Parmesan cheese
1-2 teaspoons roasted garlic or 1 - cloves chopped
1/2 tarragon

Make sure you rinse the artichoke heart when you are draining them, try to use the ones that are packed in water. If not just rinse well and drain.
If you want to use roasted garlic...peel away the outer layer of skin and slice off the top of a head of garlic so you can see some of the cloves, and drizzle with olive oil. Wrap in foil or place in a clay garlic roaster or baking pan or muffin tins. Bake at 400°F for 30-35 minutes, or until the cloves feel soft when squeezed. Roasted garlic can be added to so many dishes and gives it a wonderful mild not so sharp garlic flavor.

In a bowl (of course) stir the soft cream cheese until smooth and add the sour cream and mayo. Then add the remaining ingredients and blend together. You can adjust the amounts until it is the right consistence for a spread. You might want to less mayo or more cream cheese if you like a spread rather than a dip.

You can always add mozzarella or Monterey Jack cheese, some hot sauce, more garlic and bake it in the oven to have a hot spinach artichoke dish. Or maybe I'll just post that one latter for the holidays! Enjoy!

Wednesday, September 14, 2011

Grilled Eggplant with Tomato

Another idea for tomatoes, basil and mozzarella or other cheese. I don't really have a recipe for this but they are easy to make. Slice the eggplant in 1/4" slices. Salt them and let et for a bit, then press the moisture out of them. If you use a white or Japanese eggplant you could skip this step. Brush with olive oil...here would be a good time to use one of your flavored oils. Cook on the grill or a grill pan for 3-4 minutes per side until the texture is soft or the way you like it.


then sprinkle with a crumbled cheese...maybe a little goat cheese or feta, or maybe blue cheese...

...next a nice juicy tomato slice, a little sea salt a some seasoning....

..oops forgot the basil ... slide that fresh basil in there, or you could use spinach or another green instead or in addition to the basil... or pesto would be nice.

there, all set for the cheese on top...mozzarella or the Italian four cheese blend works well. I have a cast iron grill pan that I use stove-top and I can also put it in the oven.

After you top it with the cheese place the pan in the oven to finish cooking and the cheese is melted. If you do these on the grill just close the lid of the grill after you add the cheese to the top.


You can make these for appetizers or a nice lunch (we had them for dinner).